|
PartyPreOrders Help Manual
2.
How to Create Your First Menu – Part 1 – Populating
Your Menu ‘Library’ with Course Items (& uploading images/logos)…
a.
After logging-in for the first time you will see the following
screen, which works fairly similarly to Microsoft Windows Explorer file
manager. By clicking on the plus and minus symbols will open or close the
individual branches of the navigational tree.

[Image No.2]
b.
You will next have to create a library of menu courses, so click on
the ‘+’ sign next to ‘Setup’ navigate down to and eventually highlight
‘Starters’ on the left hand side & found within the ‘Courses’ submenu (as
shown in Image No.3 below):
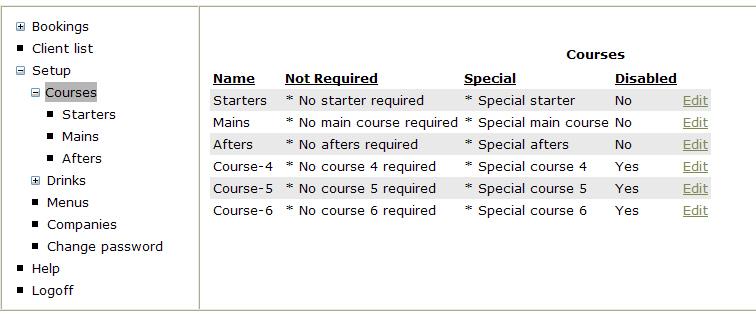
c.
You will note that each course is pre-populated with two default
selections; ‘No Starter Required’ & ‘Special Starter’. [The ‘Special
Starter’ option will allow diners to make special dietary requests in the
additional information box on their pre-order menu.]
[Image No.3]
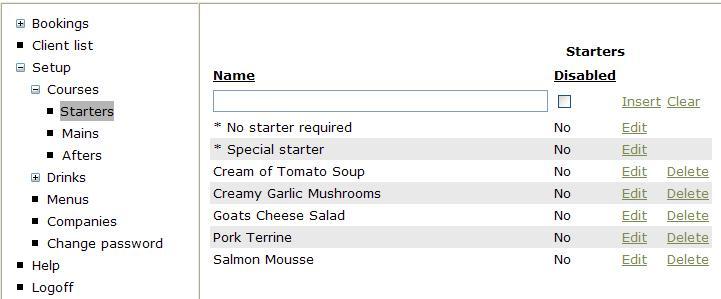
d.
You are now ready to populate your first menu. Add a short but also
descriptive menu choice (as it will eventually appear on the individual diner’s
tent card) and then press ‘insert’. Repeat this procedure for all of your
‘Starters’ and then repeat for ‘Mains’ and ‘Afters’ for you first pre-order
menu.
e.
Your menu library will start to look like the one in the image below for
Starters:
[Image No.3a]
f.
PRE-ORDER DRINKS
LIBRARY / WINE CELLAR!
-
Pre-ordering bottles of wine and water is a great way to be even
more efficient and ensure that you don't run out of stock!.
-
Adding the pre-order Drinks option is entirely OPTIONAL and if not
used, the 'Drinks tab will not appear on your customers' online
pre-orders forms.
-
'Drinks' pre-orders can be enabled/disabled for any individual
pre-order menu, which is set-up in pre-order menu design - see
latter
-
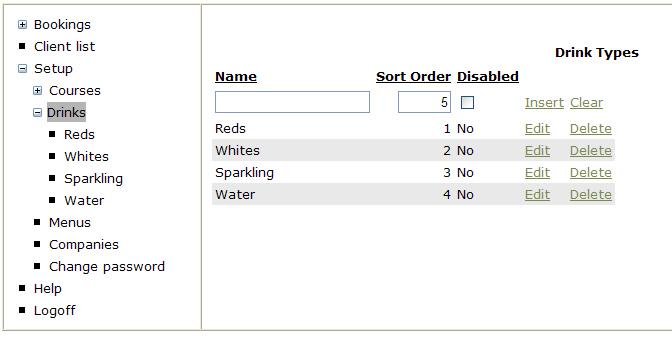
ADDING CATEGORIES OF WINE. First of all you will need to create
your categories; such as 'Reds', Whites', 'Sparkling',
'Water'; etc.. Click on drinks and you will see the image below:
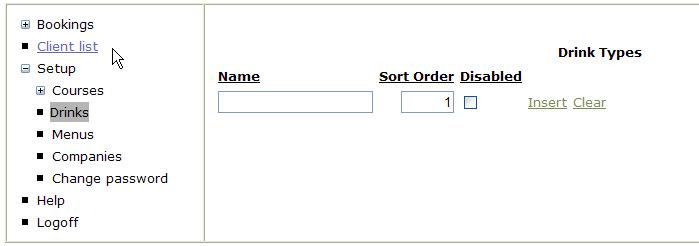
-
Type your categories
into the 'Name' box, then press 'Insert' to save to database.
When you have several categories, you can change the title or
the order they appear on the pre-order menu, by clicking edit
'Edit' then saving your changes; as in the image below.]
-
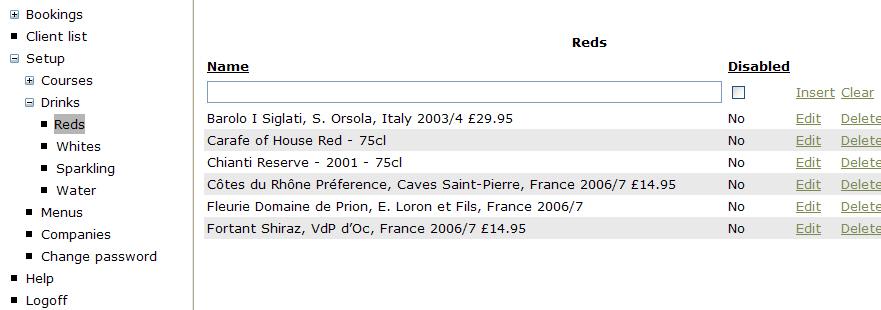
ADDING INDIVIDUAL
WINES. Next to populate for instance your selection of 'Reds',
click on ''Reds' on the left hand Side and you will see the
below image, which has also been populated with several types of
Red wine
-
Some restaurants
prefer to add volume and price to their descriptions, but you
must remember to update your prices when necessary.
-
If you are
temporarily out-of-stock, you can 'disable' an individual wine,
until resupplied or you can always delete the wine, if you are
no longer going to stock it.
-
Finally complete
your wine selection library for your Sparkling wines, etc.
f.
UPLOADING LOGOS, PERSONALISED CLIPART & PHOTOS [OPTIONAL]
The back of the tent card is an
important place to advertise yourselves with your own logo, celebrate the
event, like Easter with a clipart of a bunny or even personalise with a
birthday bash with photo of the guest of honour.
-
These photos can be selected
at printout of the Table Cards, but here is where you can add images to
our stock library of photos
-
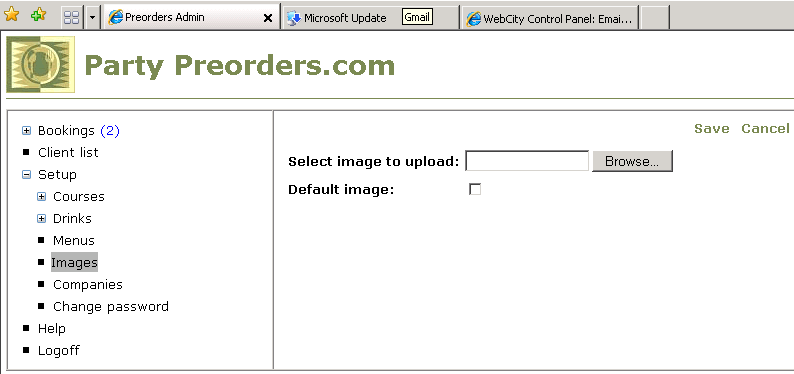
First, within 'Setup',
select 'Images' on the left hand side.
-
Initially, you will have no
images of your own, so select 'New' on the top right and you will see
the below screen.
-
'Browse' to a picture or
image on your hard drive, then if it is to be your default image on your
tent cards, put a tick in the 'default image' box. Or, if it is a
one-off leave bank.
-
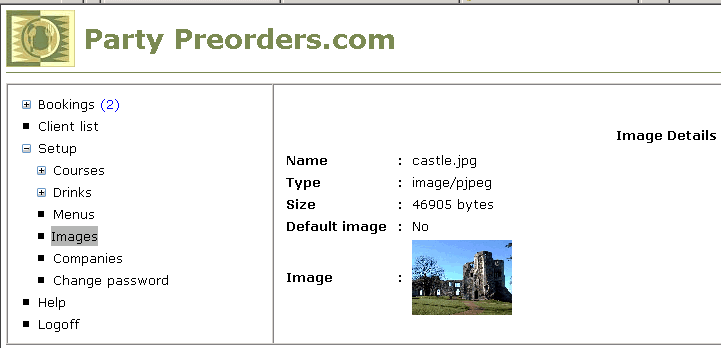
Once selected, make sure you
press 'SAVE' to upload your image to your image library.
-
N.B. You can select any JPG,
GIF or bitmap image file, preferably less than 50Kb in size (larger
images will slow down the system to the detriment of other users, but
especially yourself in speed of download of the images).
-
All images will be
automatically resized to fit your tent cards and inverted, so that they
appear the right way around for use as the back of your tent card.
-
After saving your photos to
your library on our server, they will appear as below. If you should
like to edit these files for renaming, setting as your default image or
even deleting.
Once you have populated your library,
which will be an on-going process, you are now able to create your first
pre-order menu...
|